The Google Nest Temperature Sensor can help improve your comfort if it’s a few degrees cooler or warmer than you’d like in a specific room or area of your home. Your thermostat will use the sensor’s temperature to more accurately heat or cool that room.
- The Nest Temperature Sensor is only compatible with the Google Nest Thermostat E, and Google Nest Learning Thermostat (3rd gen and 4th gen).
|
This article applies to the following Google Nest thermostat models in the US and Canada: |
|
|
Nest Thermostat E
|
Nest Learning Thermostat |


Temperature sensor settings can be adjusted in the Nest app or the Home app.
Nest app
View or change basic settings
- Open the Nest app.
- Tap Settings
on the home screen.
- Scroll down and select the sensor you’d like to change.
You can choose from the following options in the settings menu for your temperature sensor:
- Associated to: Check what thermostats your sensor is connected to. You can also quickly change what thermostat your sensor reports to.
- Check connection: Test the connection between your sensor and thermostat. This is useful if you’ve moved your sensor to a new location and want to make sure it’s in range.
- Placement: Choose the room name your sensor uses in the Nest app and add a custom label to help you identify it.
- Technical info: Find some basic technical information about your sensor, like its battery status or when it last connected.
- Remove Nest Temperature Sensor: Choose to remove your sensor from your account. You can’t use it again until you add it back.
Connect and disconnect sensors
You can connect a sensor to more than one thermostat. However, we only recommend this if you have 2 thermostats: one that controls heating, and one that controls cooling.
You can also connect up to 6 temperature sensors to one thermostat. This lets your thermostat monitor temperatures in different rooms with different sensors. However, your thermostat can only use one temperature sensor at a time to control your system.
To disconnect a sensor from your thermostat or connect it to another thermostat in your home, follow these steps:
- Open the Nest app.
- Tap Settings
- Select your thermostat.
- Choose Manage sensors.
- Tap Temperature sensors to get a list of all temperature sensors in your home. A blue checkmark will appear next to sensors that are already connected to your thermostat.
- To attach any available sensors to your thermostat, tap the empty checkbox next to it.
Set or change a sensor's schedule
After you’ve finished setup with the app, you’ll need to set a schedule for your sensor so your thermostat knows when to use it.
- Open the Nest app.
- Tap Settings
- Tap your thermostat.
- Select Manage sensors.
- Choose Sensor schedule. If you’d like to set a schedule for your sensors, tap the button to turn this option on.
- You can then choose a temperature sensor (or your thermostat’s built-in sensors) to use for each block of time:
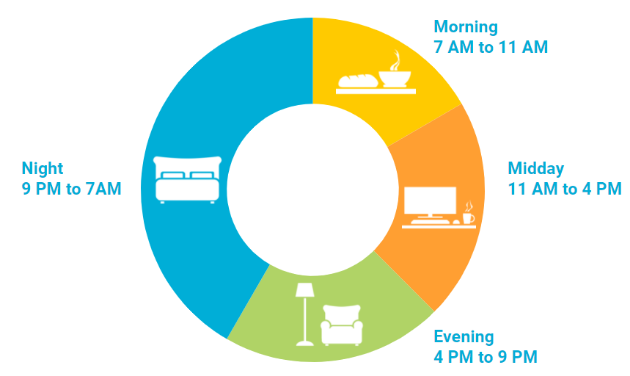
- Morning: 7:00 to 11:00 am
- Midday: 11:00 am to 4:00 pm
- Evening: 4:00 to 9:00 pm
- Night: 9:00 pm to 7:00 am
Check the temperature in rooms with sensors
Follow the instructions below to check what the temperature is in all the rooms that have sensors in them.
Note: You might also get some additional sensor information comparing room temperature to the temperature of the room where your thermostat is.
|
 |
Manually change the active temperature sensor
You can manually switch what temperature sensor is active with the app. This can help if you’re in a room that isn’t comfortable but has a temperature sensor that’s not currently active.
- Open the Nest app.
- Tap your thermostat on the home screen.
- Any temperature sensors you have connected to your thermostat will appear at the bottom of the screen. A dot will appear next to the currently active sensor.
- Tap another sensor to have your thermostat use it to control your system.
Google Home app
The Google Nest Temperature Sensor can help improve your comfort if it’s a few degrees cooler or warmer than you’d like in a specific room or area of your home. Your thermostat will use the sensor’s temperature to more accurately heat or cool that room.
Adjust Temperature Sensor settings
- Open the Google Home app
- Tap Favorites
or Devices
- Tap the temperature sensor you want to adjust.
- Tap Settings
.

Room
Associate with
Temperature sensors can be associated with more than one thermostat. If multiple thermostats exist in your home, tap Associate with to choose which ones you should be associated with. If you don’t see a temperature sensor when adjusting your thermostat, check this setting to make sure they’re associated.
Test Connection
Test the connection between your sensor and thermostat. This is useful if you’ve moved your sensor to a new location and want to make sure it’s in range.
How to test the connection between your sensor thermostat:
- Open the Google Home app
- Tap on Devices
Temperature Sensor
Change which sensors activate your system
Select which temperature sensors your thermostat should use to activate heating or cooling:
- Open the Google Home app
- Tap Favorites
- Tap your thermostat
- Select the temperature sensors you want your thermostat to use.
- Tap Save.
Add sensors to your schedule
Some rooms are consistently warmer or cooler than others, which makes it difficult for them to reach the set temperatures. When you change the Temperature Sensor your thermostat uses, your thermostat will heat or cool your home until the room the sensor is in reaches the target temperature.
Multiple sensors can work together to balance the temperature in your home. If you select more than one sensor, your thermostat will use the average temperature between them. Note that your thermostat also has a temperature sensor built in to it. When no Temperature Sensor is selected, it defaults to use its internal sensor.
Add sensors to your schedule so your thermostat knows when to use it. For example, you might want your thermostat to use a Temperature Sensor in your living room during the day and a Temperature Sensor in your bedroom while you sleep.
- Open the Google Home app
- Tap Favorites
- Tap your thermostat
- Tap the event you want to use a Temperature Sensor for.
- In the Using Sensor section, select the sensor the thermostat should use.
- Tap Save.
Manually change the active sensor
When you adjust your thermostat, consider choosing a Temperature Sensor located in the room where you’re located.
- Open the Google Home app
- Tap Favorites
- Tap your thermostat
- Choose the sensor your thermostat should use.
Check the temperature in rooms with sensors
Follow the instructions below to check what the temperature is in all the rooms that have sensors in them.
- Open the Google Home app
- Tap Favorites
- Any temperature sensors you have connected to your thermostat appear at the bottom of the screen. A check mark is shown next to the active sensor(s).
- Tap Select sensors to change the currently active sensor.