
On this page
Create tasks in Calendar

Outlook:
Create tasks
|
Calendar:
Tasks
|
|
Outlook 2016

Outlook 2013

Outlook 2010
|
You can use Calendar to keep track of tasks.
You can also edit, delete, and complete tasks from your calendar. Learn how to manage tasks in Google Calendar.
- Go to Google Calendar.
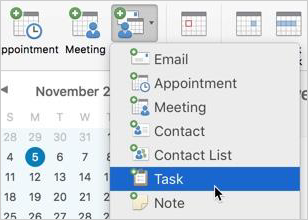
- Choose an option:
- In your calendar, click an empty slot on your calendar.
- In the top left, click Create.
- Click Task.
- Enter your task details.
- Click Save.
Tips:
- Any tasks with dates you create in the Tasks app appear on Google Calendar.
- A list of all uncompleted tasks from the last 365 days is available in your current day on Google Calendar.

|
Get your daily agenda in your inbox
Calendar: Daily agenda
You can get an email each morning with your daily agenda.
- In Calendar, go to Settings

 Settings.
- On the left under Settings for my calendars, click your name and go to Other notifications.
- In the Daily agenda field, click the Down arrow
 next to None and select Email.

Use filters to move Calendar responses out of your Gmail inbox
Outlook:
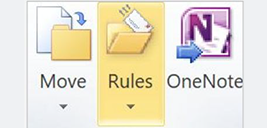
Rules
|
Calendar and Gmail:
Create filters
|
|

Outlook 2016 and 2013
Outlook 2010
|
- Open Gmail.
- In the search box at the top, click Show search options
 . .
- In the To field, enter your email address.
- Next to Has the words, enter invite.ics OR invite.vcs.
- Check the Has attachment box.
- Click Create filter.
- Check the Apply the label box and choose a label to automatically sort incoming event response messages.
- If you want response messages to be automatically moved out of your inbox, but want to be able to access them later, check the Skip the Inbox Archive it box.
- Click Create filter.

|
Set working hours
Outlook:
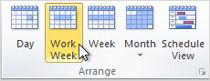
Show work hours
|
Calendar:
Set working hours
|
|

Outlook 2016 and 2013
Outlook 2010
|
If you’d prefer not to be invited to events outside of your working hours, you can adjust your Google Calendar settings so organizers know to reschedule an event to a better time.
- On your computer, open Google Calendar.
- At the top right, click Settings
  Settings. Settings.
- On the left, under "General," click Working hours.
- In the "Working hours" section, click Enable working hours.
- Select the days you work
 the times you work. the times you work.
- You can split the hours you work based on when you're available.
- To add more than one time period to your workday, next to a day of the week, click Add
 . .
- To remove a time period, click Remove
 . .
Tip: When you add work hours, the start time must be before the end time.
Calendar may suggest working hours based on your time zone, the work patterns in your country, and your schedule. You can accept, decline, or edit these suggestions. Learn more about Calendar in different time zones.

|
Create an appointment schedule in Calendar
Outlook:
Create separate appointments for each guest
|
Calendar:
Create an appointment schedule
|
|

Outlook 2016

Outlook 2013

Outlook 2010
|
Important: Appointment schedules replace appointment slots. Learn more about the changes to appointment slots.
You can better manage your availability in Google Calendar with appointment scheduling.
With appointment schedules, you can:
- Create and share booking pages so people can book time with you.
- View booked appointments alongside your schedule in Calendar.
Create an appointment schedule
Important: To create an appointment schedule on a secondary calendar or add co-hosts to an appointment schedule, you need an eligible Google Workspace subscription. Learn more about premium features for appointment schedules.
- On a computer, open Google Calendar.
- At the top left, click Create
 . .
- Click Appointment schedule.
- Enter a title.
- The title is visible to anyone who has the link to your booking page.
- The title appears on your calendar for the schedule and incoming bookings.
- To set an appointment duration, click the down arrow
 . .
- Appointments must be at least 5 minutes long.
- Set the date, time, and time zone of your appointments.
- You can set up a one-time or recurring appointment schedule.
- Tip: To add multiple time slots for a single day, click Add another period to this day
 . .
- Choose settings for your appointment availability, such as your scheduling window or days when you won't be available. Learn about customizing your availability.
- Choose a primary or secondary calendar where you want to add your appointment schedule.
-
Tips:
-
Once you create an appointment schedule, you can't edit it to be on a different primary or secondary calendar.
-
Anyone with edit permission to a secondary or primary calendar can make changes to the schedule and view incoming bookings. Learn more about access permissions.
- Optional: To avoid conflicts for events created or accepted on primary or secondary calendars, under "Calendars," select Check calendars for availability. Then, select all calendars for which you don't want bookable times to be available during any created or accepted events.
- Important: Each appointment slot on a booking page can only be booked once even with this feature turned off.
- To add co-hosts to the appointment, enter the co-host's names or email addresses.
- Click Next.

Learn more at the Google Calendar Help Center
|
Google, Google Workspace, and related marks and logos are trademarks of Google LLC. All other company and product names are trademarks of the companies with which they are associated.


 .
.


 .
.
